Clapboard siding repairs


Make sure that you slide a piece of flashing or even tar paper behind vertical joints when you install clapboard. I think this is better than caulk, because the clapboard needs to breathe. If it is cedar be sure to use galvanized or stainless nails. Also prime all 6 sides before installing.

Employment Wanted
Latest Jobs
Employment Wanted
-
Apr 26, 2024 at 1:58pm
-
(Classic Painting and Materials) Fair Prices. Spring and Summer Specials
Apr 25, 2024 at 5:14pm
-
Apr 25, 2024 at 8:08am
-
Apr 24, 2024 at 1:13pm
-
****Laundry + Bedrooms Organization : closets,drawers,shelves
Apr 24, 2024 at 8:04am
Help Wanted
-
Apr 25, 2024 at 6:15pm
-
PF504 FT Companion/FA for 16 Year Old (ASAP Start)
Apr 25, 2024 at 4:05pm
-
Apr 25, 2024 at 12:24pm
-
Part-time long term Nanny for toddler boy in Basking Ridge
Apr 24, 2024 at 7:49pm
-
PF802 FT M-Th Nanny for 2 (ASAP Start)
Apr 24, 2024 at 1:21pm
Lessons/Instruction

Rentals
-
Huge Brand New construction Apartment in 2 family home with 4 bedrooms 3 bathrooms
4 Bd | 3Full Ba
$4,500
Advertisement


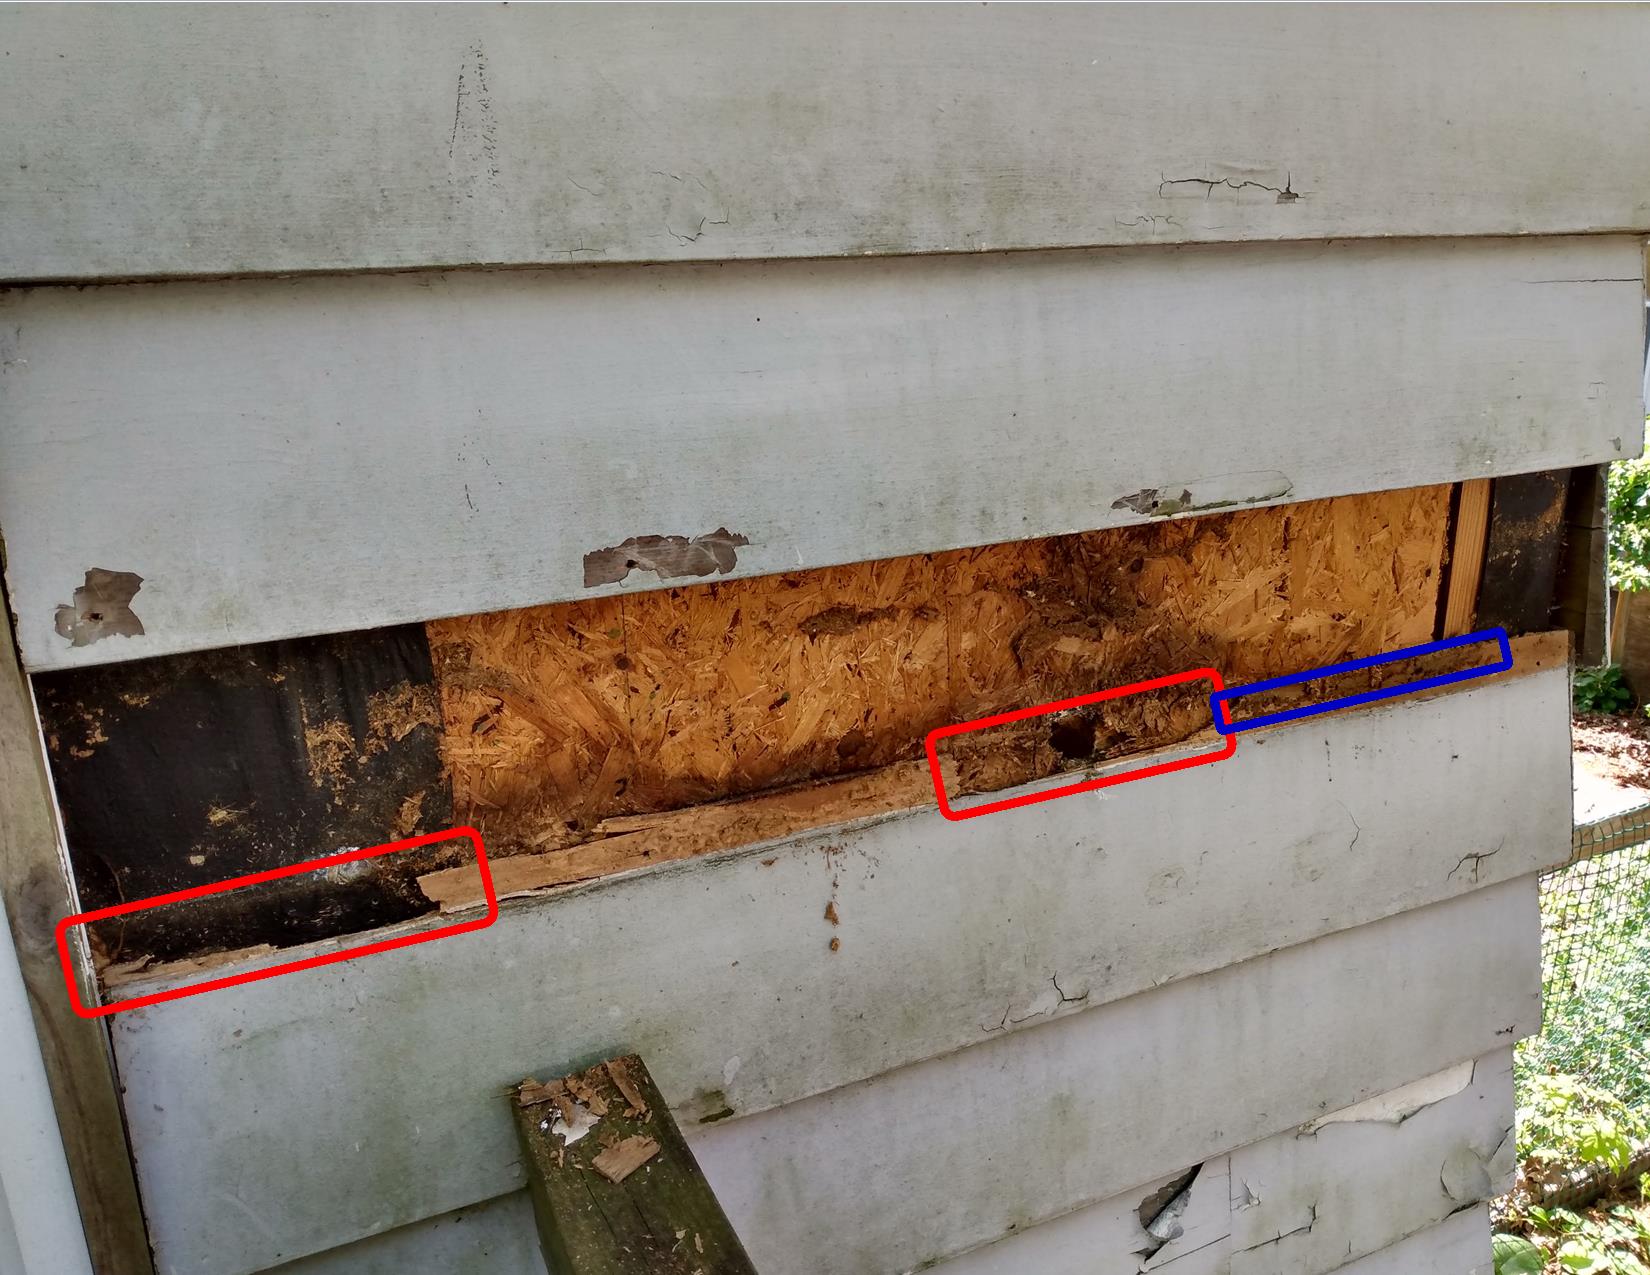
A lot of houses in Maplewood have clapboard siding (mine included). Clapboard = a tapered board, where each higher course overlaps the one below by about 1.1/2".
Today I was doing some repairs for a neighbor. One board had some cracks (had been caulked in the past to seal the crack), I forgot to take a 'before' picture; but it was time to replace it. I pulled it off, and found significant detoriation to the board below the compromised board (see photo).
The thin section that fits behind the compromised board, had largely disappeared (red outline) or was rotting away (blue outline). Fortunately, the damage did not extend further, so we were able to repair this with two courses of new clapboard.
Conclusion: Don't let it be by painting over cracks. Replace damaged clapboard when you find it!
NOTE: When you replace clapboard, make sure to caulk all vertical seams/joints.